In this guide I’ll walk you through installation of a Ridetech Coilover Suspension. The project car used in this article is a 1972 Oldsmobile Cutlass Supreme, and in concept is nearly identical for any GM A Body car, such as a Chevelle, Malibu, Monte Carlo, Tempest, LeMans, GTO, Grand Am, Grand Prix, Cutlass, Skylark, Century and Regal Etc.
Overview
Here’s a quick highlight of things you should know BEFORE you get started, and that Ridetech doesn’t tell you up front.
- WATCH THIS VIDEO and understand suspension geometry design, pro’s, and con’s.
- This kit will lower the car ~2 inches and increase ride stiffness.
- Estimated full-car disassembly and install time is a full weekend, 10-20 hours depending on your shop and skills.
- Drilling and some grinding is required to install, although the steps are fairly simple.
- On an A-Body car I needed to drill two 3/4″ holes on the front upper shock mount, and two 1/2″ holes on the rear lower shock mounts, and do some grinding on the disc brake caliper brackets.
- The cost of the kit is somewhere near 3 grand depending on your scope, maybe more. Be aware before you get started.
- The rear exhaust may interfere with the new rear coilovers, requiring exhaust mods. Mine interfered.
- If you have headers, the front control arms may require header “Massaging”. Mine required header bashing on the passenger side lower rear control arm area, although this was really the new headers fault, as the new control arm is essentially the same position as stock in this area.
- New rear axle geometry COULD require driveshaft length mods, although this is unlikely since the front is being done as well.
- A full car lift and axle jack would be seriously helpful for the rear axle suspension installation, but it is completely possible without.
- You’ll need lithium grease for the Delrin/Poly bushings.
- You will need to get a wheel alignment (obviously) and will need new alignment shims for the front.
- The kit includes NO, 0 , NADA, ZIP, ZILCH torque specs, even for the ridetech specific parts like the upper ball joint plates. VERY DISAPPOINTING RIDETECH IF YOU’RE READING! Reference your repair manual or assembly manual for torque specs, and estimate the missing specs based on bolt size (do an internet search). I’ve included pictures of my car’s torque specs for reference.
- The kit’s instructions are mediocre at best, and completely wrong at worst. I’ll point out the incorrect steps as they applied to me. You will need to use your brain for this install to account for this and don’t take the instructions as gospel if something isn’t making sense.
- This kit does NOT include a new bushing for the rubber upper axle control arm mount. It should in my opinion, but perhaps it doesn’t because of the variety of applications.
- You’ll need a few 1/2″ washers, my kit was missing some.
- You’ll need a grease gun for the new balljoints, original tie rod ends, and new rear poly bushings.
- You need a very large socket for your front wheel bearing nuts. I believe mine was 36 mm. Check yours before you start and order one if you don’t have it, otherwise you’ll be stuck mid project waiting for it to arrive. You may want to order new dust caps also if yours are beat up.
- Your new lower control arms may be slightly different than OEM with regard to your swaybar, and require a swaybar shim kit. If you’re in a time crunch, buy the shim kit up front to limit delays, since they are only 10 bucks. Mine was close to OEM, but about 1 shim off.
The Benefits
- Safer handling overall
- Hubs provide Improved self-centering characteristics (More caster)
- Reduced Bumpsteer (Control arm length and taller hubs)
- Less body roll (stiffer springs, lower ride height)
- Improved cornering (all of the above, plus taller spindles allow front wheels to turn into a corner rather than out, like a motorcycle)
- Longer life bushings (Poly/Delrin)
- Stronger Control arms (tubular and new)
- Lighter weight (everything)
- Easier maintenance (bushings and ball joints are not pressed in, easy change-out)
- The new poly bushings do NOT need to be final torqued at ride height because they are not pressed, while original style rubber bushings do.
The Downsides
- Harsher ride, more NVH.
- Lower ride height (could be a down side to some)
- Possibly noisier (poly bushings can squeak if not lubed properly, however mine are still quiet after ~5k miles.)
- Unproven high mileage durability (arguable) vs factory.
- Loss of original value on a classic.
- Cost, $$$
- Possible compatibility issues (exhaust interference, front disc brakes etc)
- Higher steering effort for manual steer cars.
The Kit
My kit came delivered in 4 large boxes. The packaging was SUPERB! Possibly the best packaging I’ve ever seen. Each part was individually wrapped many times in foam for protection. There was 0 shipping scuffs or damage. You’ll have to figure out which hardware bags go with which components, since they aren’t labeled and not specified in the instructions.


Front Suspension Installation
Before Pic

This car was bone stock before this installation, and fairly worn out. I won’t copy every step from their included instructions; instead, I’ll focus on highlights and pictures to give you an idea of scope and tricky spots.
The Kit:


Disassembly:
The first step is disassembly. Do one side of the car at a time so you can reference the other side if needed. Remove wheels, calipers and rotors, outer tie rods at the control arm, upper and lower control arms, original upper cross shafts, anti sway bar at the control arm. NOTE! Remove the calipers, brackets, and wheel bearing’s bolt and all the bolts attached to the wheel hub while the old wheel hub is still attached to the car! If you don’t the bolts are tight enough that it’s impossible to do with the hub assembly sitting on the ground.
During disassembly keep all of the original hardware in case the kit doesn’t include it. Also maintain the position of the upper cross shaft alignment shims to give you a starting point for your re-alignment. My kit disappointingly did not include the upper cross shaft bolts and nuts despite having almost everything else, and if you have after-market brakes you may need some of that hardware.
While you have the brakes off, this is an excellent time to paint the calipers/rotors and grease the wheel bearings.
Assembly:
Begin by assembling the new control arms per the instructions. This is fairly straight forward. Install the ball joints before putting the control arms on the car. The torque spec wasn’t included, and based on the bolt size I found a recommended range of 14-18 ft-lb. Loosely bolt the upper and lower control arms on the car. Note that the upper cross shaft is offset. You will get slightly more negative camber by facing the aluminum inserts towards the engine as shown below.


Assemble the new coilovers. The order of install of the coilovers is as follows, in-order of bottom to top:
- Lower aluminum spacers
- Lower threaded retaining plate WITH locking bolt
- Lower gasket/ring
- Spring
- Upper gasket/ring
- Upper non-threaded retaining plate
- Upper locking ring
- Upper plastic mount insert (below frame)
- Upper plastic mount insert (above frame)
- Upper aluminum washer/spacer
- Upper lock nut.
Note: the front and rear springs are different. The kit didn’t specify any details on the springs, or which went where. On my car, the longer springs were for the rear and were too tall to fit on the front coilover shocks. Hopefully it’s obvious on your car as well.


When assembling the coilovers, thread the bottom plate on enough to take out all of the play in the spring, and add one turn. This is the point of 0 offset. I recommend marking it with a marker. You can not have the plate loosened more than this, as the spring will become unseated every time you jack up the car if you do. Tightening the plate more than this will raise the ride height of the car, and is an acceptable adjustment. Typically up to 1-2 inches of upward adjustment is acceptable. Once assembled, loosely tighten the locking bolt for the lower threaded spring mount. After final assembly you will likely have to loosen this and adjust it again to equalize the ride height for each side of the car. No torque spec was provided for this bolt, however it is small and threaded into aluminum so don’t over do it.
Attempt to install the coilover loosely into the car. More than likely the frame’s upper shock mount will be too small for the new upper coilover mount. Measure and drill as needed. Mine required 3/4″ holes in the frame’s upper shock mount.
Install coilovers loosely into the car.
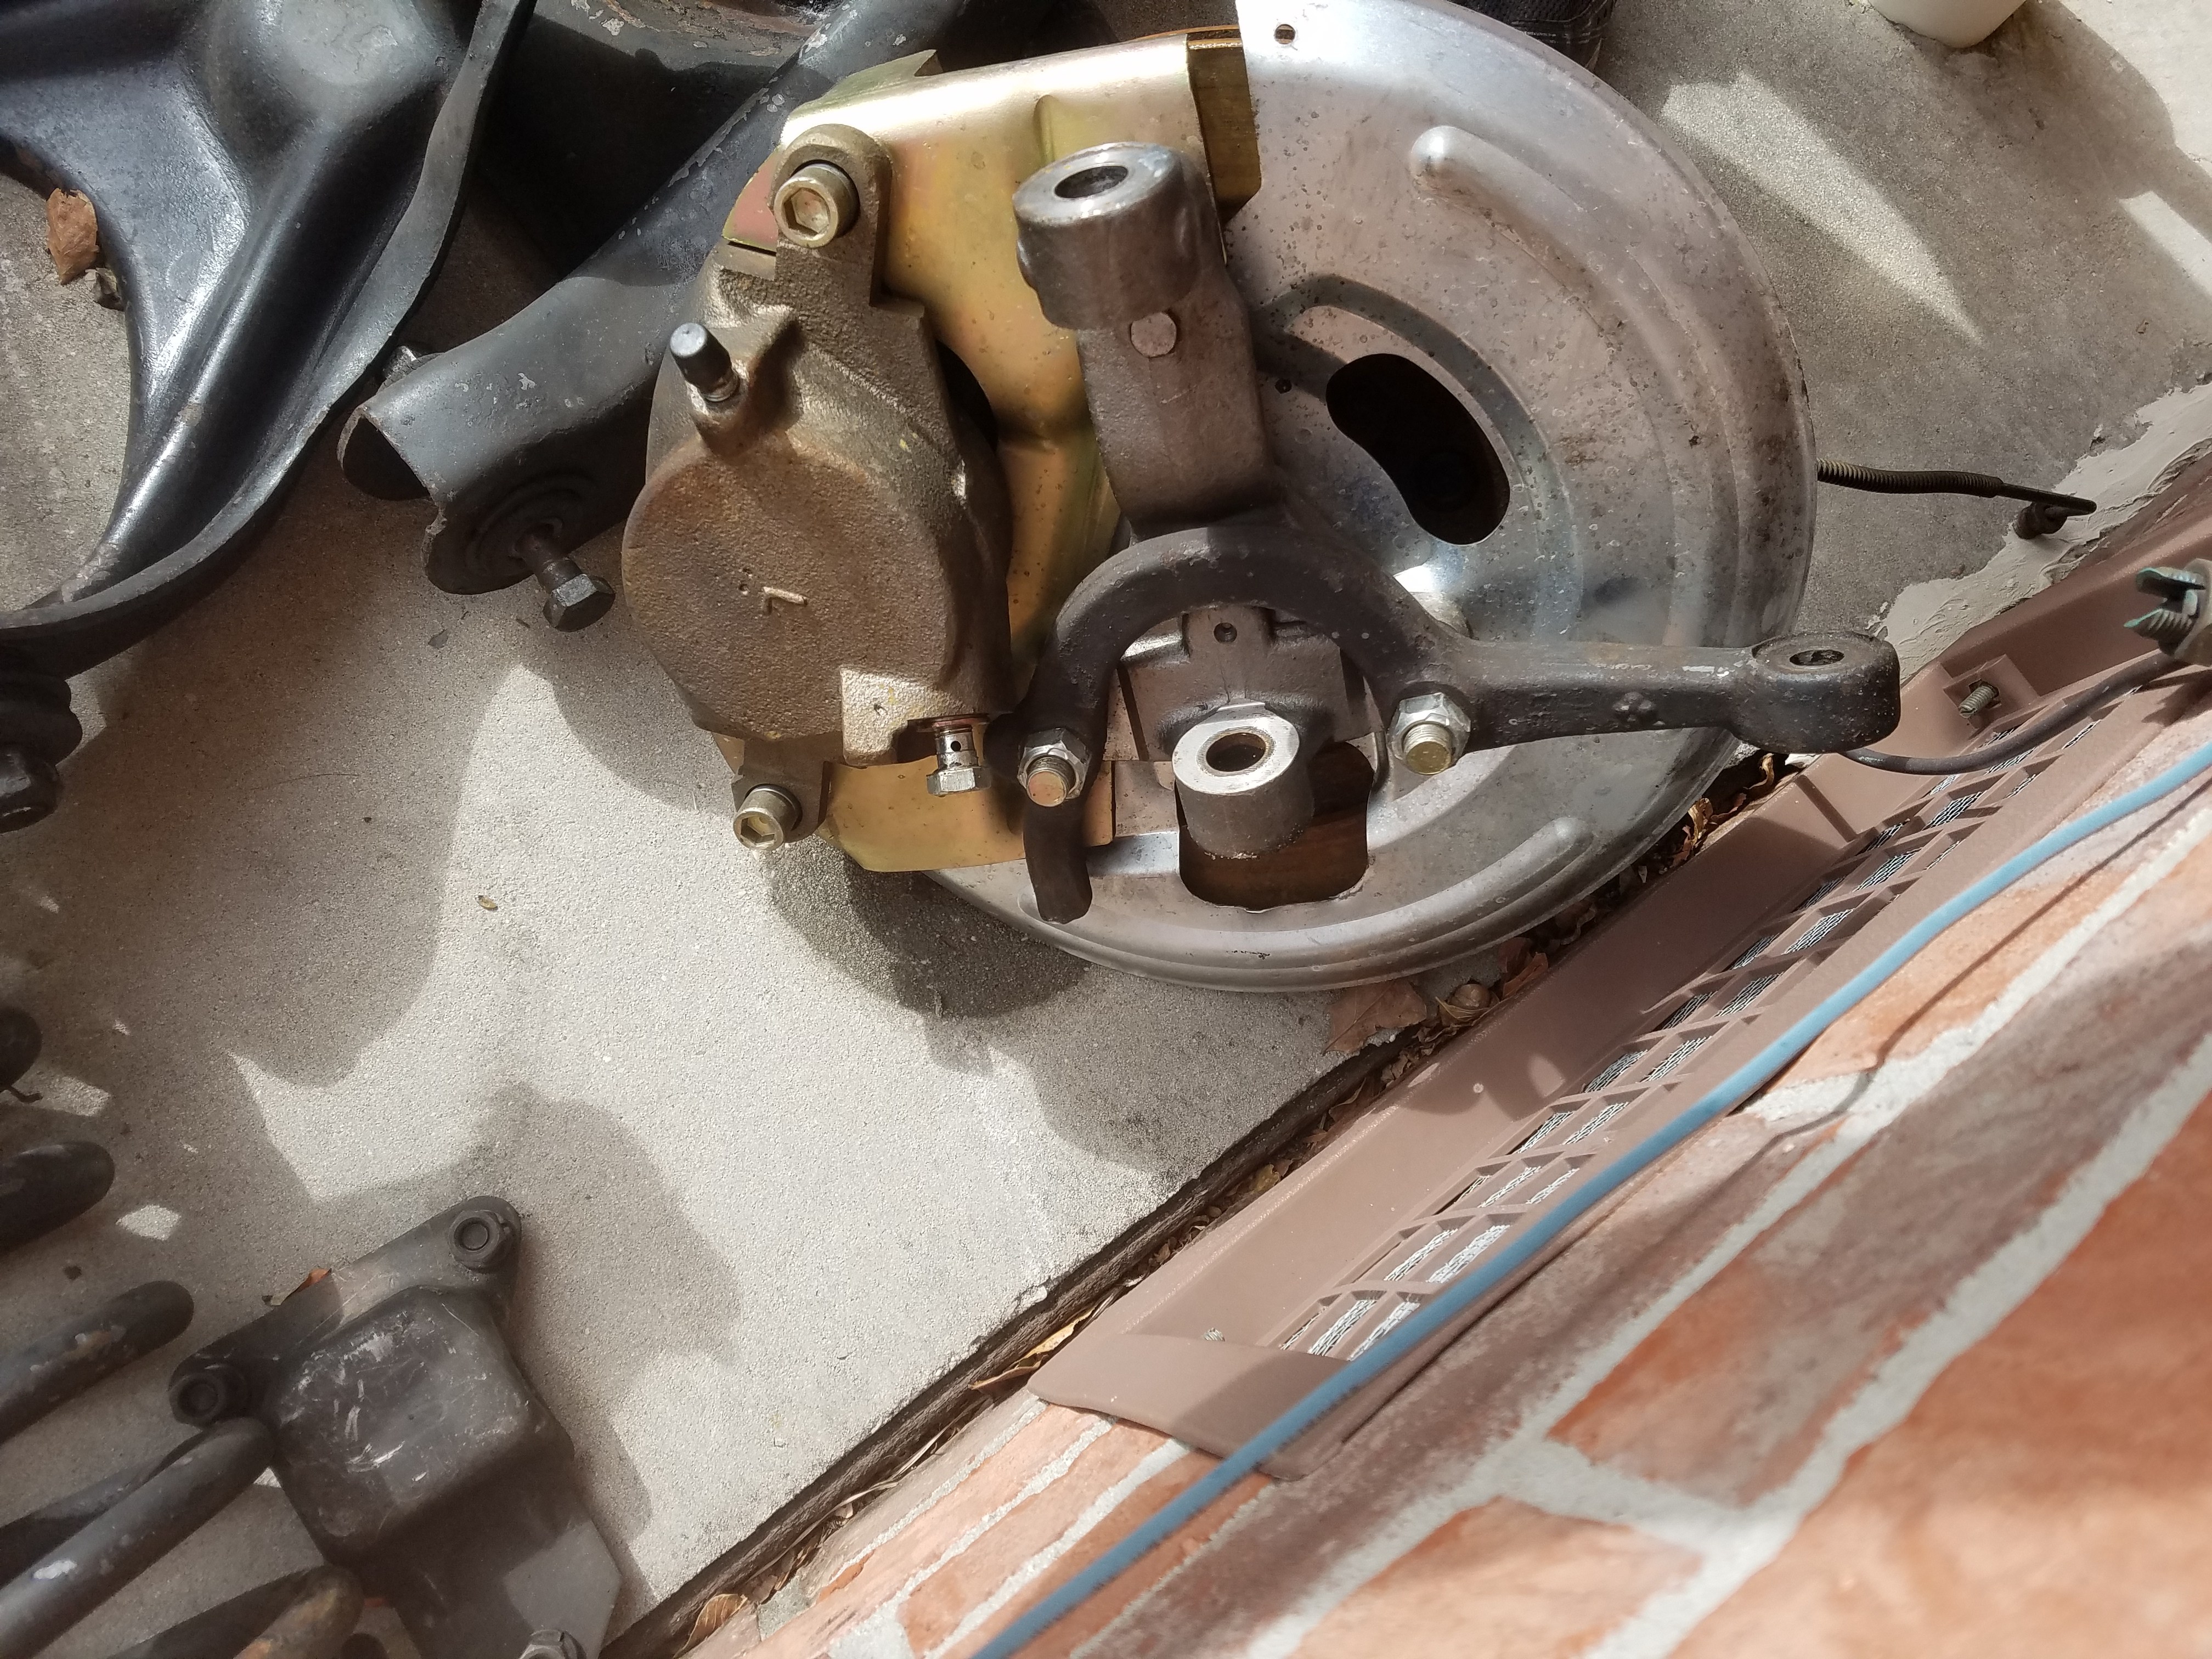
Now that the coilover and control arms are on, loosely fit the new wheel hub onto the ball joints. This is where you will need to test fit your caliper brackets and dust shield, which you already unbolted during disassembly. One spot of the lower caliper bracket will probably need to be ground away as it interferes with the new wider lower section of the new wheel hubs. Grind as necessary with a death wheel or similar. Mark with a sharpie prior to grinding to give you an idea of what line to follow. Take off as little as possible at a time and re-fit as needed.
Pics of my unassembled “The Right Stuff” Disc brake conversion kit. As mentioned earlier, disassemble this prior to removing the original hub. All of this except the hub and bolts will be re-used.The gold bracket is what requires some grinding.


Once complete, re-pack the wheel bearings, and grease the new wheel spindle. Once you remove the protective netting from the wheel spindle protect it, as this must be a polished machined surface for the wheel bearings to ride on. Install the disc brake rotor. Install the wheel bearing nut.
Here’s the procedure for my wheel bearing nut:
- Install nut and tighten to 20 ft lbs.
- Loosen nut until finger loose.
- Tighten nut hand tight. (I put a socket over the nut and tightened the socket by hand as much as possible.)
- Install cotter pin. If the nut requires tightening more than 1/8 turn to install colder pin you must restart.
- If you do this wrong or my instructions are wrong for your car, don’t blame me, it’s your fault.
Install brake calipers and dust shield. Massage dust shield as required to clear new wheel hubs.
Reinstall original tie-rods, sway bar links etc.
Final torque everything per your car’s specs. Don’t forget cotter pins everywhere there is a castle nut.
Repeat for the other side.
Before lowering, turn the wheels lock to lock and check for any binding or interference. Spin the front wheels by hand to make sure they spin freely. When you lower the car for the first time, lower it slowly and check for binding. Give it a few bounces and listen for any interference.
Completed Front Install:


