Need to shed some light in dim areas? Repair or add new lighting to your ride? This was a quick and fun Saturday project that only takes an hour or two.
Total Cost for the below example: $5
Total fabrication and install time: 2 hours
The trunk light switch and dome light on Project Dangerboat were broken, and an OEM replacement part was $100. So on a Saturday morning I decided to play around with some ideas for a new light in the trunk and upgrade those old G90 etc bulbs to some more reliable and less thirsty LEDs. The beauty of LEDs is that they are small and versatile
LEDs:
MAKE SURE they are rated for 12v use. You can buy LED’s rated for lower voltage (3v for example) and wire in resistors to step the 12v car wiring down to the LED rating. If you’d like to do this, Ohm’s Law is your ticket.

- R = Resistance needed
- Vs = voltage of your power source (Battery). For automotive, this is 12V unless you have some rare vehicle. Some military applications are 24V for example.
- Vf = Voltage rating (Forward voltage) of your LED that you bought.
- i = LED rated current in Ampres (20 mA for example which equals 0.02 Ampres)
12v LEDs are readily available so this shouldn’t be necessary.
Decide what brightness you’re looking for. I am also installing ambient driving lighting and gauge lighting in many areas of the car, so I opted for some dimmer light. If you were building a spot light or flashlight you’d of course want some brighter LEDs. 20mA are fairly dim, but very cheap. These are the specs for the LED’s I used in the below pictures, and 120 LEDS cost $11.
Feature:
ITEM Size (mm): 5mm
Wire Length: 21CM
Forward Voltage (V): 12VDC
Forward Current (mA): 20mA
White Color MCD: 16000-20000 MCD
Lifespan: 50,000 Hours
Viewing Angle: 25 Degree
Pre-wired with built in Resistor
Color:6 Colors,Each of Color 20PCS(Red/White/Blue/Green/Yellow/Warm White
Package Includes:
120 X Pre wired LED Diodes Light
LED Holders:
If you buy standard 5mm LEDs such as the above, there are tons of holder options. Metal and Plastic are available, depending on the look you are going for. If you are installing Visible LEDS into a metal panel such as indicator lights then perhaps metal holders would look good. Since my installs will all be hidden, I used plastic holders for ease of use and cost. 
- Plastic 100x5mm LED Holder Clip
- Inner Diameter:5mm;Length:6.5mm
- To hold your LED on any kinds of panels quickly
- Nice snap on and good grip well without pull out or fall from the holder
- Handy Spacer support and keyhole standoffs for your LED light
Install:
This is for a Trunk Light.
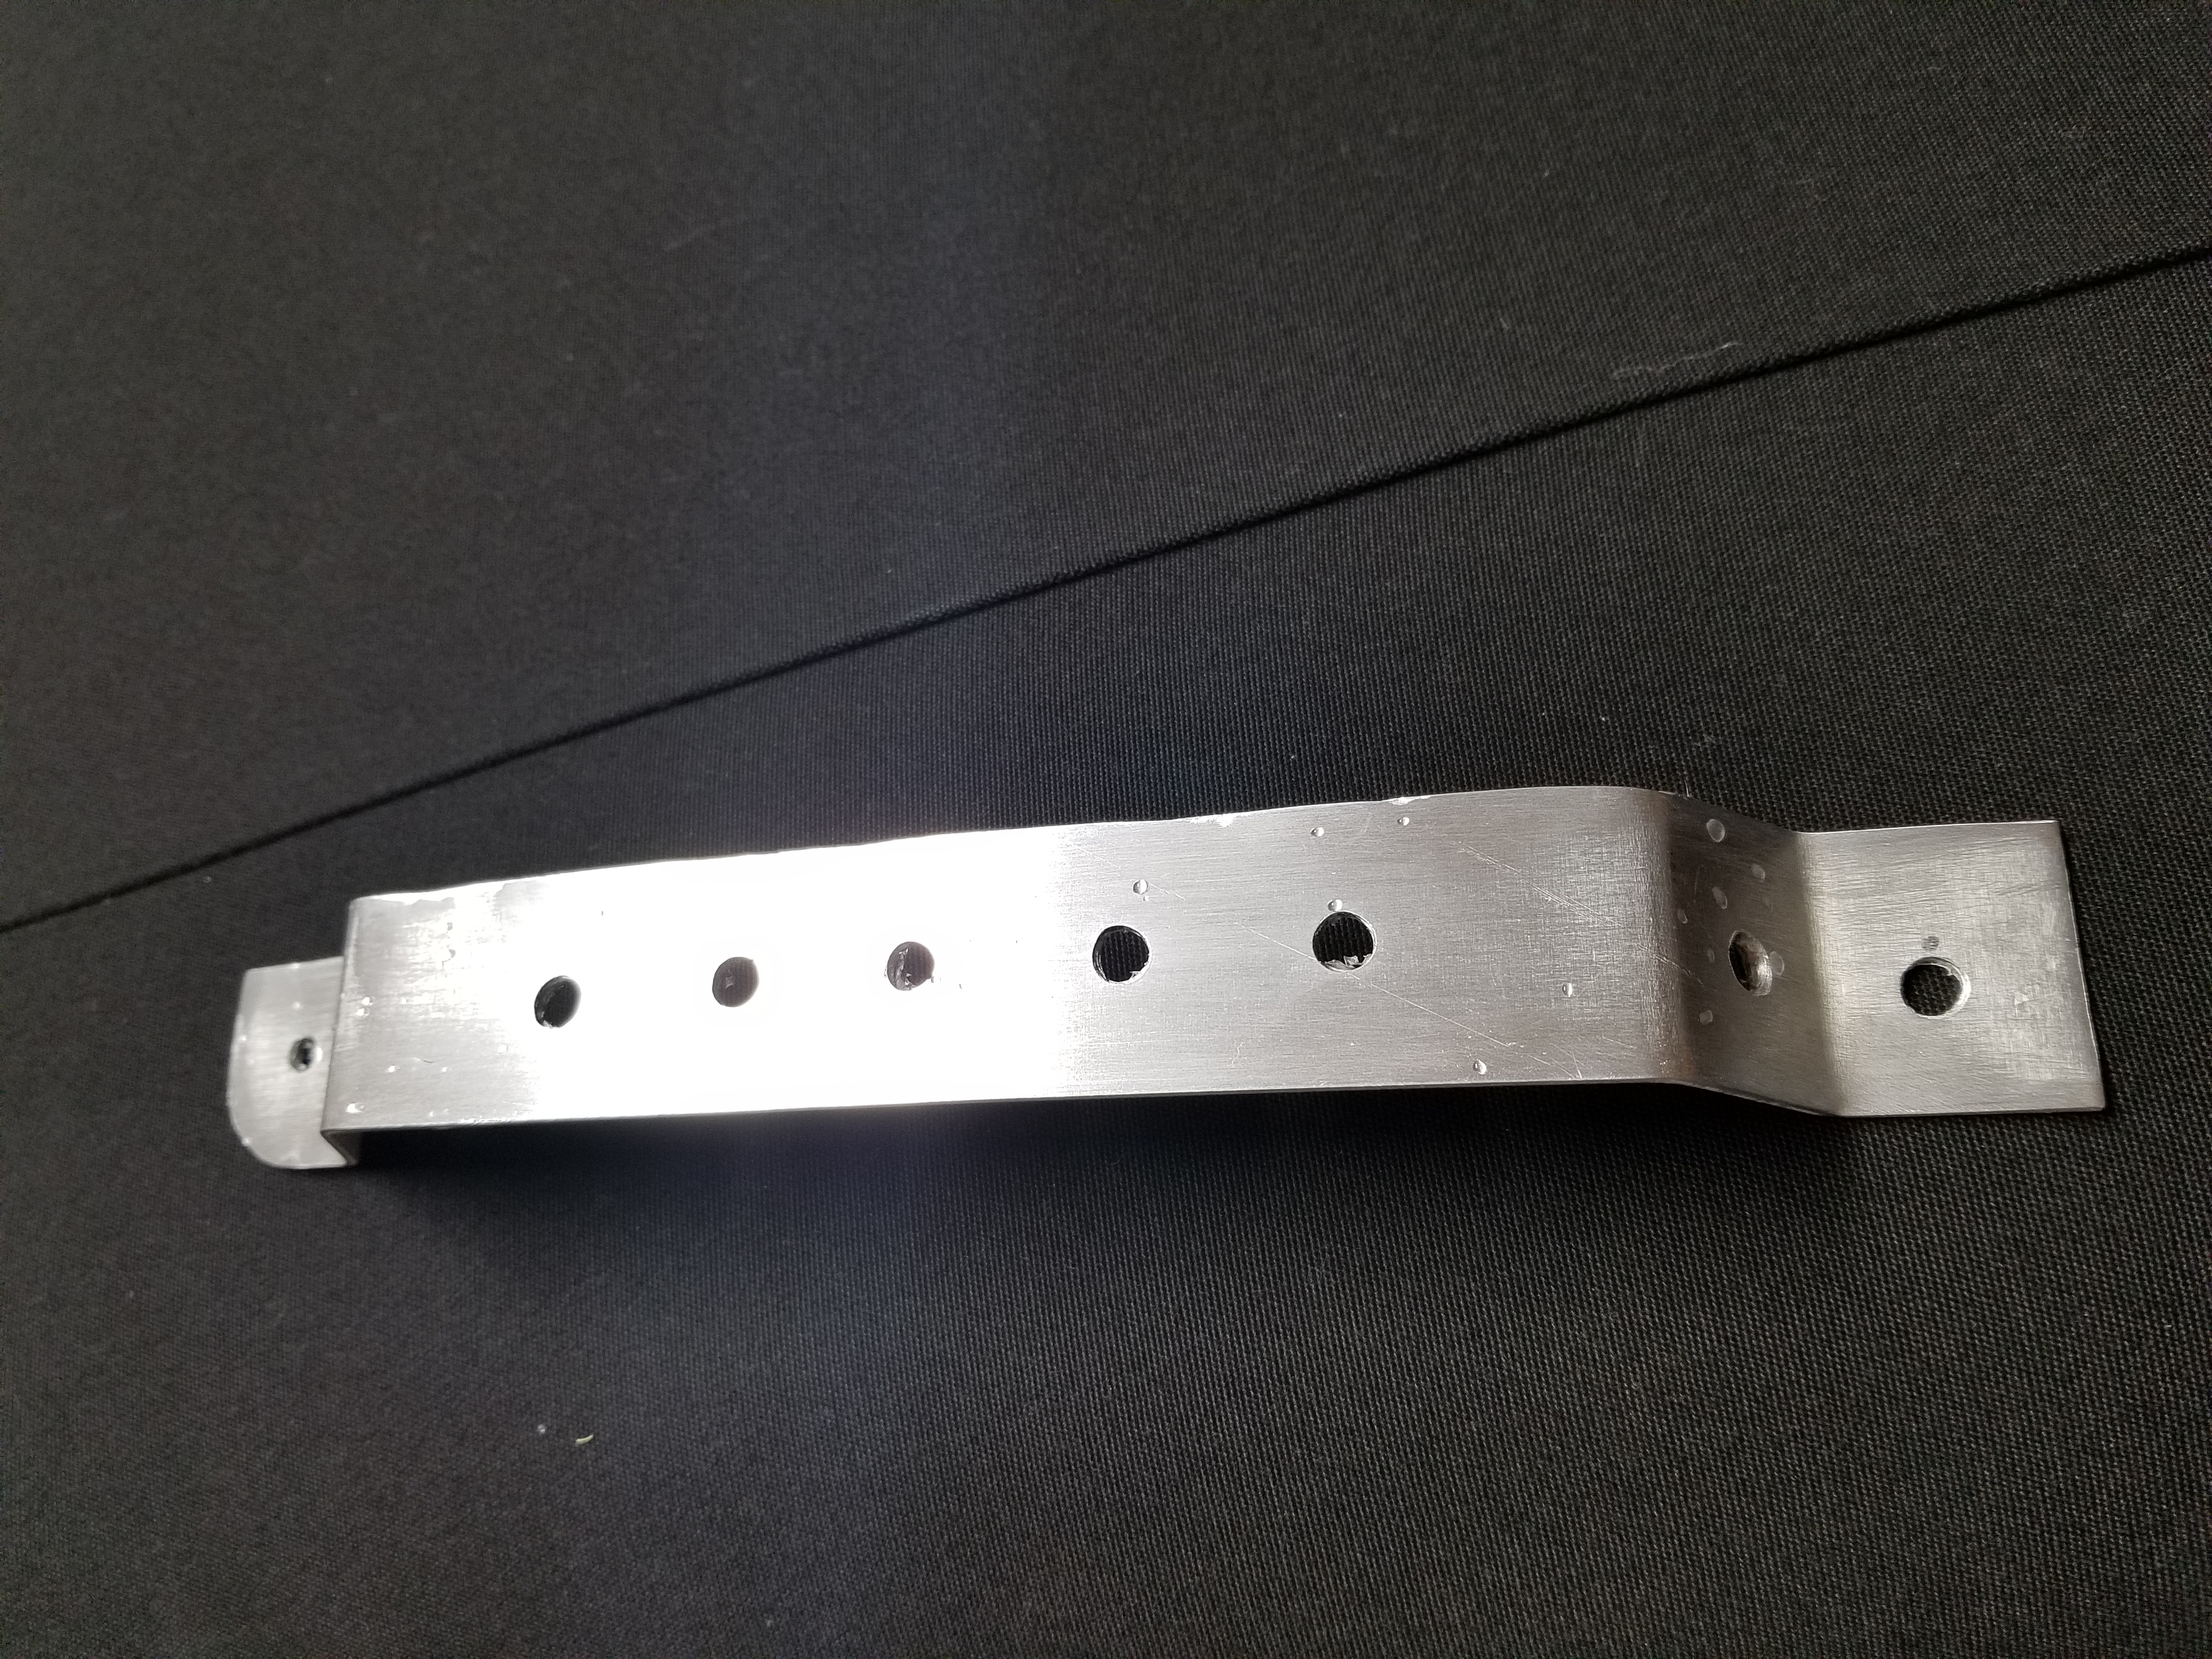
I used 1/8″ thick aluminum scrap metal as the bracket material, since it’s easy to drill, bend, and won’t rust. Sand the metal to provide a nice brushed metal look. Choose the number of LEDs required to provide the light  you are interested in, and size the holder accordingly. I wanted to use 6-7 LEDs since mine are only 20 mA.
I cut a strip of aluminum approximately 1″x7″. I measured and drilled each of the holes for the LED holders and mounting screws. The LED holders required a 5/16″ drill bit. I then pre-drilled and used short self tapping machine screws to mount the assembly to the trunk roof.
Each of the LED leads were stripped and soldered as a bundle to a lead wire for running to ground or the hot power source. LED polarization is NOT reversible! If you wire the leads in reverse they will not light up, so test before final soldering.

The ground I connected directly to the aluminum bracket. The hot I connected to a rocket launcher switch, which I mounted to the side of the trunk where it won’t get hit by any cargo, but is still easily visible. The power source is connected to the dome light circuit since this circuit is hot at all times and already fused correctly from the factory.
I bent the strip of aluminum using a bench vice. Measure where each of the bends needs to be, and if using aluminum or thin steel simply bend by hand. I bent at a 60 degree angle vs 90 degree to provide a sloped side, which allowed me to install an LED that faced towards each side of the trunk for more distributed lighting.
I may add a radius arc to the flat center section of the bracket to provide more even light distribution in the center.


Finished Trunk Light

Overall, not bad for $5 compared to $100 for the factory piece. I also get the benefit of cool and efficient LEDs!
LEFTLANEBRAIN


